Background
Portworx by Pure Storage has introduced a new version of its Kubernetes CSI driver (PX-CSI), designed to simplify how Kubernetes clusters consume persistent volumes. Version 25.4.0 brings official support for Pure Cloud Block Store, enabling enterprise-grade block storage for a new frontier in the cloud - Kubernetes clusters such as Azure Kubernetes Service (AKS).
In this post, we’ll take a closer look at how to install PX-CSI on an Azure Kubernetes Service (AKS) cluster and mount a persistent volume into a container, backed by a Pure Cloud Block Store (CBS) array.
Architecture Overview
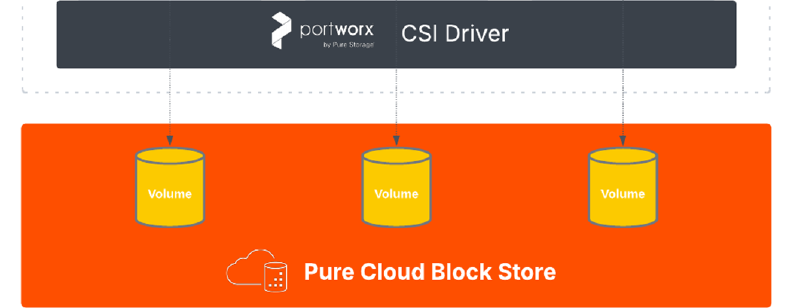
Before diving into the installation, let’s briefly review the architecture of our solution. PX-CSI is deployed as a set of managed pods on your AKS cluster and integrates with the Pure Cloud Block Store array to provision and attach volumes on demand. In FlashArray Direct Access mode, each Kubernetes PV directly maps to a volume on the array, and the application’s data is written straight to the array. This provides the performance and data services of Pure’s enterprise storage to your containerized apps, without using any intermediate storage pools on the cluster.
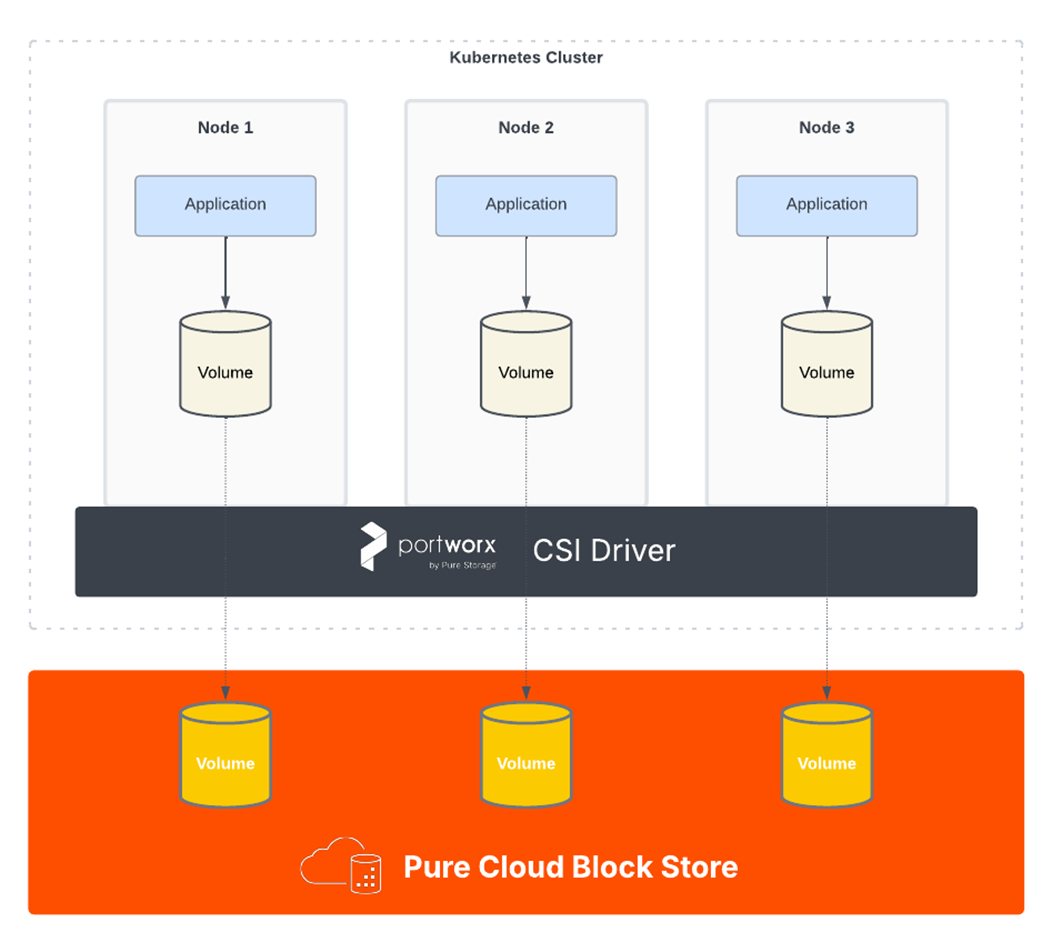
In essence, when a PVC is created with the storage class backed by CBS, PX-CSI communicates with the CBS’s management plane (via its REST API) to create a new volume. That volume is then attached over iSCSI to the appropriate AKS worker node and made available to the requesting pod. This architecture allows you to leverage Pure’s deduplication, compression, snapshots, and high availability features for your cloud-native workloads. What you are going to need is an instance of Pure Cloud Block Store, deployed into the same vNET as AKS will be deployed into.
Step 1 - Create an AKS Cluster
PX-CSI requires a Kubernetes cluster with a minimum of 3 worker nodes to maintain internal KVDB quorum, which is used to manage storage metadata and runtime state . It’s also recommended to use sufficiently sized nodes (e.g., 4 vCPU and 16 GB RAM or larger) to accommodate the storage services alongside your application workloads.
When deploying the AKS cluster, make sure to select the Bring your own virtual network option under the Networking tab. This step is crucial because the AKS nodes must be able to communicate with the Pure Cloud Block Store instance’s endpoints — including the management interface and iSCSI target IPs.
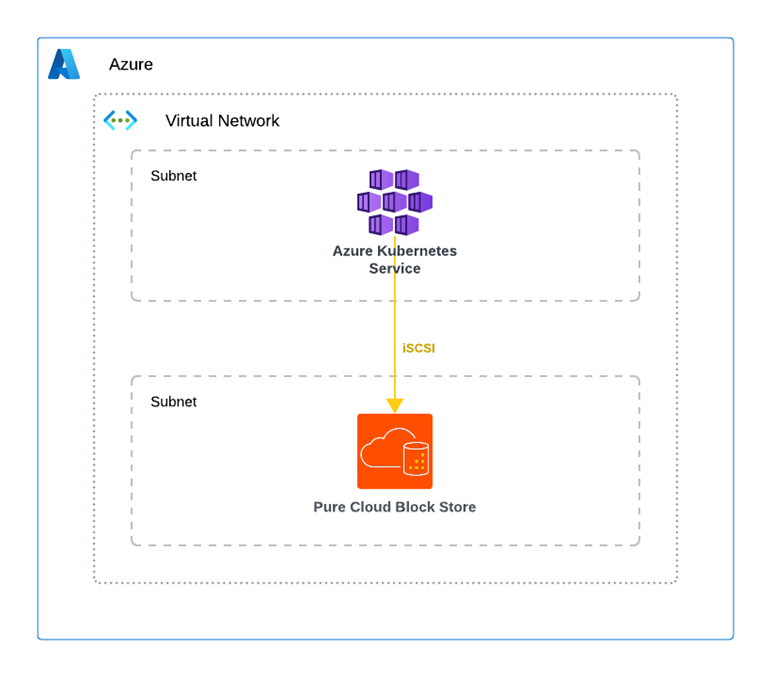
Be sure that no Network Security Groups (NSGs) are in place that could block this communication. For optimal performance and reliability, is recommended deploying the AKS cluster into the same virtual network (vNET) as the Pure Cloud Block Store instance. This ensures low-latency connectivity and helps avoid unexpected network-related costs.
Step 2 - Connect to the AKS Cluster
With the AKS cluster running and the Portworx spec in hand, the next step is to apply the configuration to the cluster. It’s convenient to use Azure Cloud Shell for this, as it comes pre-loaded with Azure CLI and kubectl. Open the Azure Cloud Shell in your browser (from the Azure Portal or via https://shell.azure.com). Make sure your shell is set to Bash for familiarity.
Authenticate and set Kubeconfig - ensure you’re connected to correct AKS:
| |
Now you are operating in the context of your AKS cluster.
Step 3 - Create the Configuration File (pure.json)
Portworx PX-CSI requires a JSON configuration file with information about your Pure Cloud Block Store array. This file (named pure.json) will contain the management endpoint and API token for your array, enabling Portworx to authenticate and create volumes via the Pure REST API.
Portworx also supports Cloud Block Store multi-tenant setups - however, for the purpose of this post, we’ll use a single-tenant setup.
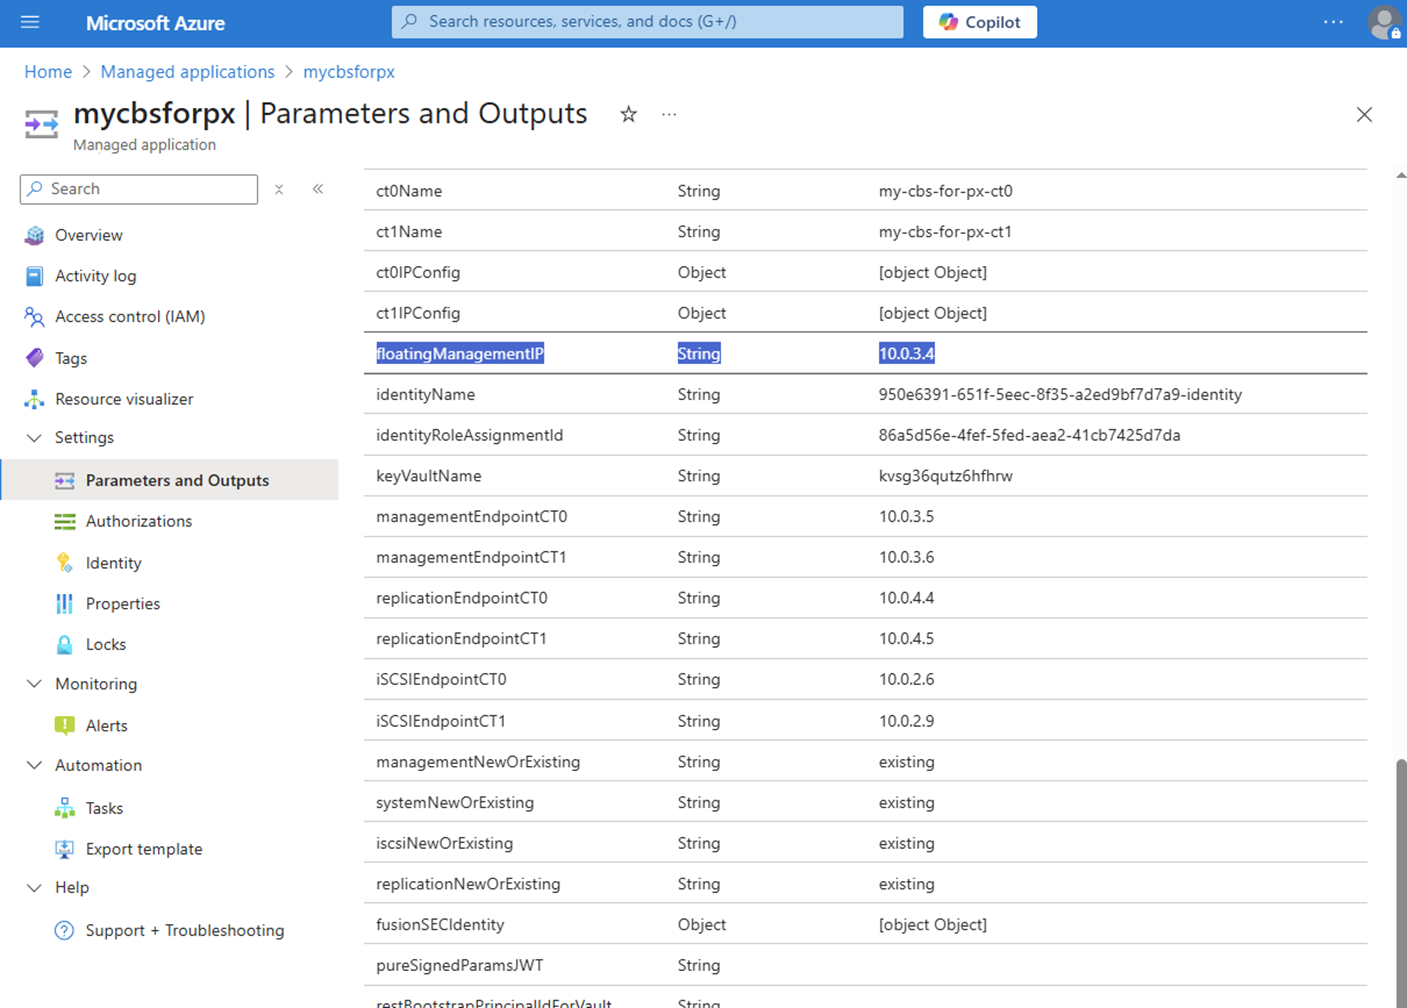
To proceed, we’ll need to create a configuration file that requires two values. The first is the IP address of the CBS management console, which can be found as the floatingManagementIP output variable in the Managed Application resource, representing your CBS array.
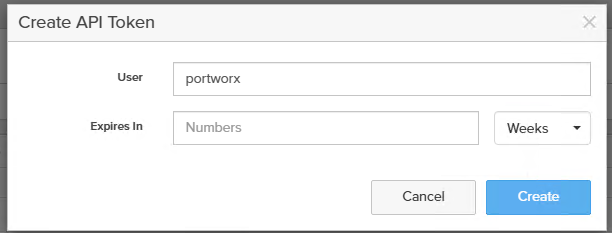
From the array management UI, find the Management Endpoint and generate an API Token for an account with Storage Admin privileges (it can be a new dedicated user for Portworx, e.g. portworx-user).
Generate a new API token under Settings > Users and Policies – create a token that doesn’t expire, or note its expiry if it does.
Now, create a file named pure.json with the following structure (replace the placeholder values with your actual endpoint and token):
| |
With pure.json ready, the next step is to provide it to Portworx by creating a Kubernetes Secret.
Upload the pure.json file to your Cloud Shell environment (you can use the upload button in Cloud Shell or use an SCP command to the Cloud Shell storage). Once the file is present in your Cloud Shell, run the following command to create the secret in your AKS cluster:
| |
This command will create a secret named px-pure-secret in the portworx namespace (we will deploy Portworx in the portworx namespace for clarity).
Info
It is important to use the exact name px-pure-secret, as the Portworx driver looks for a secret by this name during startup.
You should see a confirmation like secret/px-pure-secret created.
The secret contains the management endpoint and token and will be mounted by Portworx pods to authenticate with the array.
Tip
Note: Ensure the secret is created in the same namespace where Portworx will be installed. In our case, we use the portworx namespace (if you plan to deploy Portworx in a different namespace, adjust the --namespace accordingly).
The Portworx Operator will pass this secret to the PX-CSI driver automatically on deployment.
Step 4 - Configure Auto-Enabling of Multipath
Since Azure Kubernetes Service (AKS) does not enable Multipath I/O by default on new nodes, we need to configure it manually.
To automate this process, we’ve prepared a DaemonSet that automatically detects new nodes in the cluster and applies the required configuration changes.
To deploy the DaemonSet, simply apply the following YAML:
| |
Step 5 - Generate the PX-CSI Installation Spec
Portworx provides a convenient online tool, PX-Central (accessible at https://central.portworx.com), to generate a custom installation manifest for your Kubernetes cluster.
We will use PX-Central to configure our Portworx deployment for our needs:
Log in to PX-Central: Navigate to the PX-Central site and log in with your Pure Storage/Portworx credentials. If you don’t have an account, you can create one on the site.
Select PX-CSI and Version: In the spec generator, choose PX-CSI as the product type. Ensure you select version 25.4.0 or higher for PX-CSI, as version 25.4.0 introduced enhancements and is required for the features we need.
Configure Kubernetes Settings: Set Distribution to “None” (since AKS is a standard Kubernetes environment). Select the Kubernetes version that matches your AKS cluster’s version (e.g., 1.31.8). This ensures the generated manifests are compatible with your cluster’s API version.
Enable iSCSI Support: In the Portworx configuration options, make sure to set Storage Area Network to “iSCSI”.
Generate and Download Commands: After filling in the required settings, PX-Central will generate a set of Kubernetes manifests or commands, providing a Portworx Operator installation manifest and a StorageCluster custom resource (CR) manifest tailored to your config.
You may see two kubectl commands - for example, PX-Central might instruct you to run:
| |
These are placeholders – PX-Central will give you actual URLs - please keep them handy, we will need them in the next step. The first command installs the Portworx Operator (which manages the deployment), and the second creates the StorageCluster CR which describes the desired Portworx cluster configuration (including the Pure Cloud Block Store integration).
Step 6 - Install the Portworx Operator and PX-CSI Driver
Now it’s time to deploy Portworx on the cluster. We will apply the manifests obtained from PX-Central to install the Portworx Operator and the Portworx StorageCluster specification. The operator will then pull up all necessary components including the PX-CSI driver.
Apply the Portworx Operator manifest: Use the command or file from the PX-Central output to install the operator.
This will create the Portworx Operator deployment and related roles. You should see resources like serviceaccount/portworx-operator and deployment.apps/portworx-operator get created. The operator is a controller that will watch for a StorageCluster custom resource and deploy Portworx components accordingly.
Apply the Portworx StorageCluster spec: Next, apply the PX-CSI cluster spec YAML (the second command from PX-Central). This command creates a StorageCluster object which describes the desired state of Portworx on your cluster. When you create this object, the Portworx Operator will begin deploying the PX-CSI pods.
You can verify the creation of the StorageCluster CR in the output: e.g., storagecluster.core.libopenstorage.org/px-cluster created.
Once both the operator and the StorageCluster manifests are applied, give the system a few minutes to pull the container images and initialize the pods on all nodes.
Step 7 - Verify the Portworx PX-CSI Installation
After installation, you should verify that Portworx and its CSI components are up and running. Use the following command to check the status of Portworx pods:
| |
This will list all pods in the portworx namespace (assuming you installed Portworx there). You should see the Portworx Operator pod and the PX-CSI driver pods in a Running state.
For example, the output might include entries like:
| |
In the above example, the operator is running (1/1 containers ready), a CSI controller stateful set pod is running (with multiple containers for provisioner, attacher, etc.), and a CSI node plugin pod is running on each AKS worker node. The exact pod names may vary, but look for pods prefixed with portworx- or px-csi-. All pods should reach Running status.
If any pod is in CrashLoopBackOff state, use kubectl describe or check logs to troubleshoot (common issues might be missing iSCSI packages on nodes or secret misconfiguration).
At this stage, Portworx PX-CSI has been successfully deployed and is integrated with Pure Cloud Block Store! The driver has likely created some default StorageClasses as well for you to use, including one for Pure FlashArray direct volumes.
Step 8 - Create a Persistent Volume Claim (PVC)
With Portworx running, you can now request persistent storage in your AKS cluster that resides on a CBS. Portworx by Pure provides a set of pre-configured StorageClass objects out-of-the-box for various use cases. The one we will use is px-fa-direct-access, which is the StorageClass for Pure FlashArray Direct Access volumes.
This storage class tells Portworx to provision volumes directly on the Pure Cloud Block Store/FlashArray for each PVC, rather than using Portworx-managed pools. Let’s create a sample Pod with PVC to verify everything end-to-end:
| |
This PVC requests a 10 TiB volume using the px-fa-direct-access storage class for the Pod px-demo-pod.
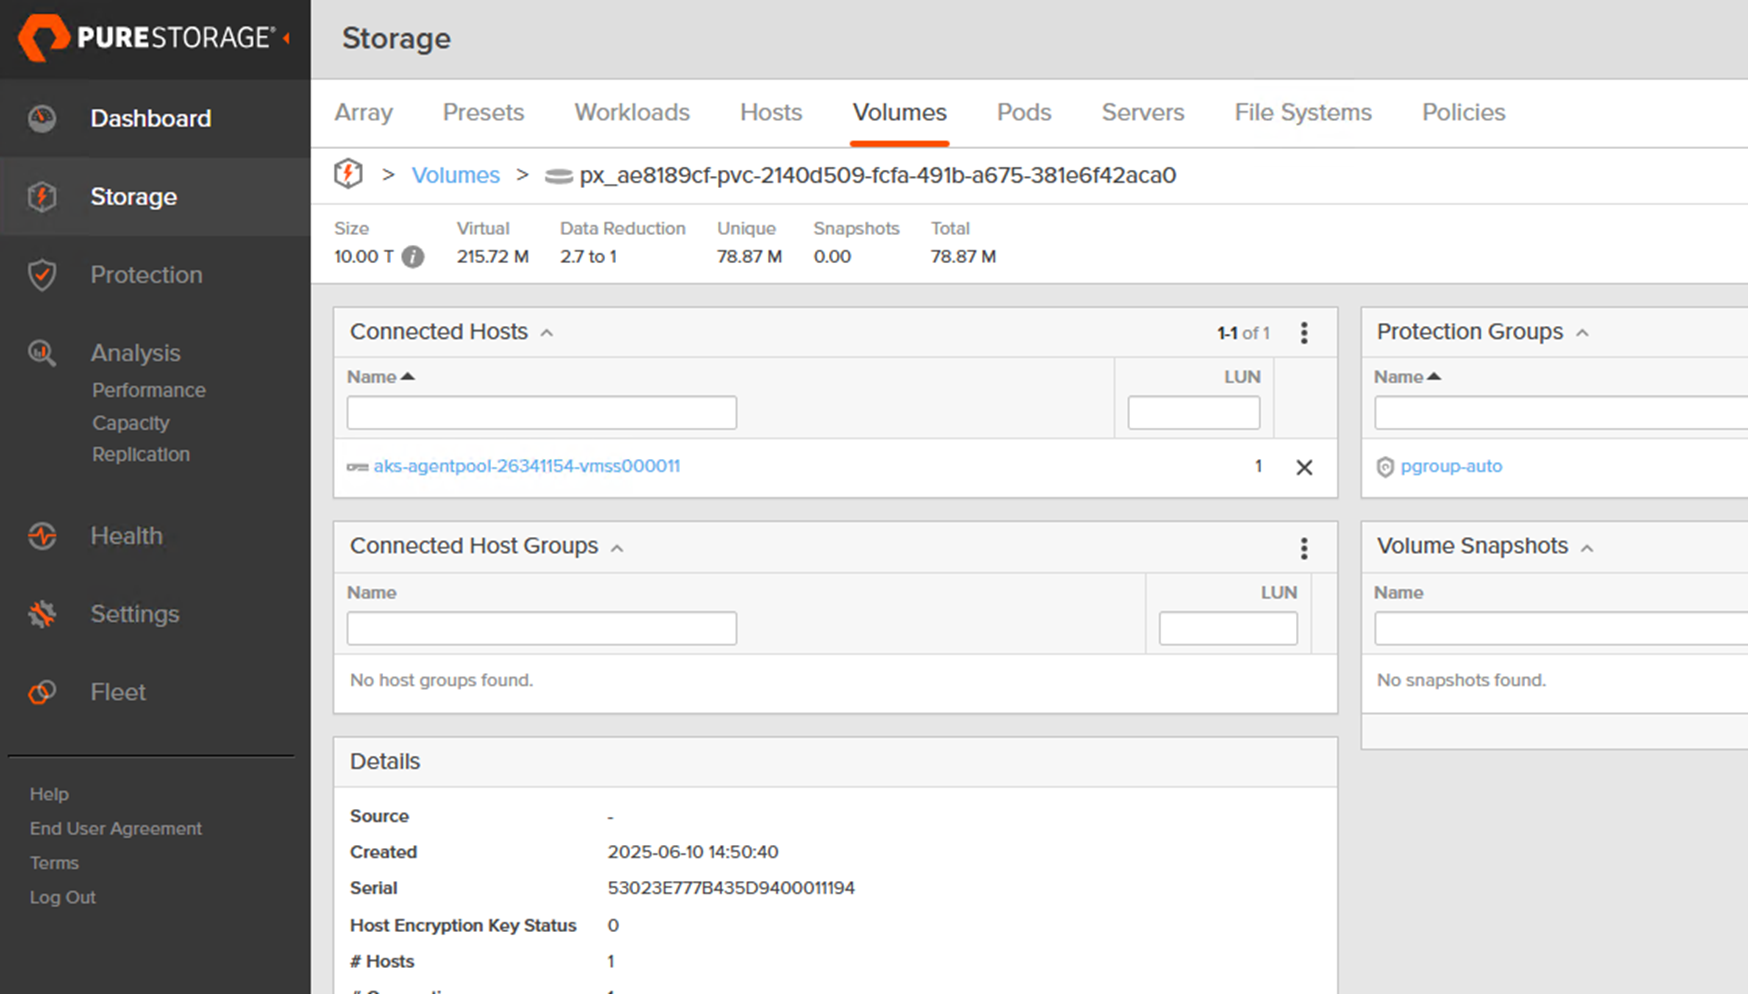
Kubernetes will submit the PVC to the Portworx CSI provisioner. Portworx then communicates with array to create a 10 TiB block volume on the array (thin-provisioned), and attaches that volume via iSCSI to one of the AKS nodes (the node where a pod using this PVC would be scheduled, or immediately if binding is immediate).
At this point, you can consume the PVC in any pod.
When we log in into the pod, we can see a mounted volume from CBS into the directory /px-storage:
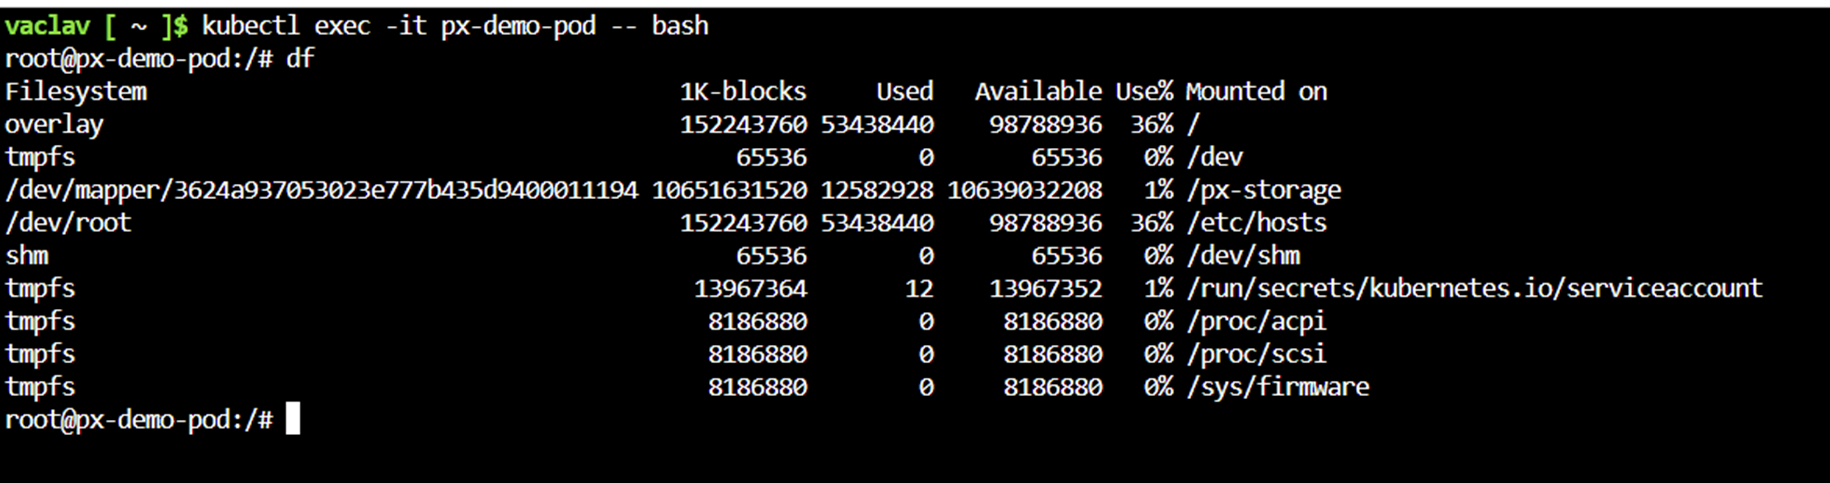
Congratulations – you have successfully set up Portworx PX-CSI on AKS and created a persistent volume on Pure Cloud Block Store!
Conclusion
Portworx CSI brings together the best of Kubernetes and Pure Storage by allowing AKS administrators to consume Pure Cloud Block Store as a native Kubernetes storage resource. In this tutorial, we created a highly-available AKS environment, configured Portworx’s PX-CSI driver, and demonstrated provisioning a PVC backed by Pure’s enterprise-grade cloud storage.
This integration simplifies cloud deployments by offloading data persistence to CBS, giving you features like data reduction and snapshots out-of-the-box on AKS.